Replacing a Tile Floor
When the time comes to remodel a bathroom, the replacement of old tile is usually one of the first steps. Whether you’re replacing the tile because it’s worn out or you just want something new, you should make sure you have the right tools before commencing with the following steps.
Remove All Fixtures
Whether or not you stick with the same toilet, sink, and vanity as before, they should at least be temporarily removed for the retiling process. Having those things out of the way will prevent them from being damaged during retiling; it will also give you more room to un-tile and retile, and it will make it easier to lay tile under those fixtures. If the bathtub is going to be replaced, remove it before you commence with retiling.
Remove the Old Tile
Before you lay the first of the new tiles, the old ones must be completely removed. A good place to start is at gaps in the tile, such as in the spot where the toilet usually sits. If the tile is stuck tight, use a hammer to crack and break it loose. A pry bar is good for pulling off larger sections. On an older floor with a mortar bed, you might need a sledgehammer to cut away at both the tile and mortar before everything can be cleared away.
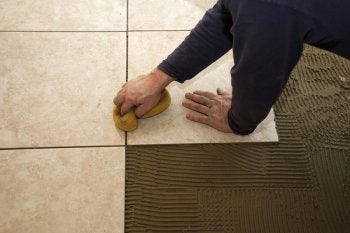
Prepare the New Tile
In some retiling projects, it’s also necessary to replace the substrate with cement or fiberglass subflooring. Before applying mortar, arrange the new tiles onto the substrate to determine the right arrangement and fit for angled and corner pieces. Let the new tiles dry for 24 hours, apply the grout, and then let that dry for another 24 hours before walking on the tiles.
Whether you need a drill or jack hammer, A Tool Shed has seven locations in Northern California where you can find an array of tools for rent. To learn more about our tools and equipment rentals, call us at (831) 359-4769.